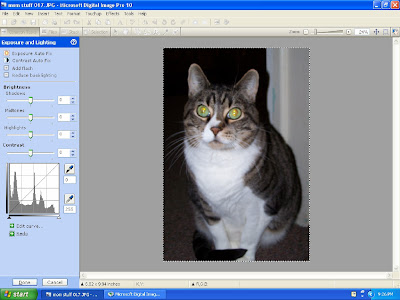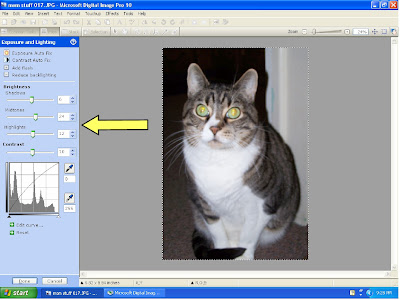

Unless you have an awesome camera or are a great photographer (I am not) then often times you will import your pictures from your camera looking like this first one of my cat. You can fix that though by opening the Exposure and Lighting Tool found on the left of the screen. Don’t be afraid to go in and do this manually. The more you practice, the better you’ll get. Can you see the difference in the two pictures? (You may have to click on them to get up close). I just played around with the midtones and highlights features till I got it lighter and looking the way I wanted. After I finish here, I usually go to the Color and Saturation tool and fix the color also. It is pretty amazing the fun things you can do with these two tools. Just get on and get to know your program; I recommend this before really getting into the digital scrapping…though doing that will help you get better too. Have fun with it and don’t get discouraged!
.
Shadow: The amount of shadow in a picture (less for a darker finish, increase for brighter – like a flash)
Midtones: Increase/Decrease to affect the amount of light in the picture.
Highlights: Increasing really brightens the white balance and can help make colors pop.
Contrast: Use this to increase/decrease the contrast between light and dark.
Midtones: Increase/Decrease to affect the amount of light in the picture.
Highlights: Increasing really brightens the white balance and can help make colors pop.
Contrast: Use this to increase/decrease the contrast between light and dark.


No comments:
Post a Comment